如何使用PowerShell创建Active Directory用户
如果您想学习如何使用CSV文件创建Active Directory用户,请
本文将为您提供批量创建Active Directory用户的分步指南。
Active Directory对实施其实施的每个组织都起着重要作用。
创建广告用户可以手动消耗大量时间,可以通过运行有助于快速创建用户的PowerShell脚本来保存。
此PowerShell脚本一次创建多个用户,节省了很多时间。
如果您需要创建批量用户,则应运行PowerShell脚本,而不是手动创建用户。
格式化Excel文件以保存为CSV
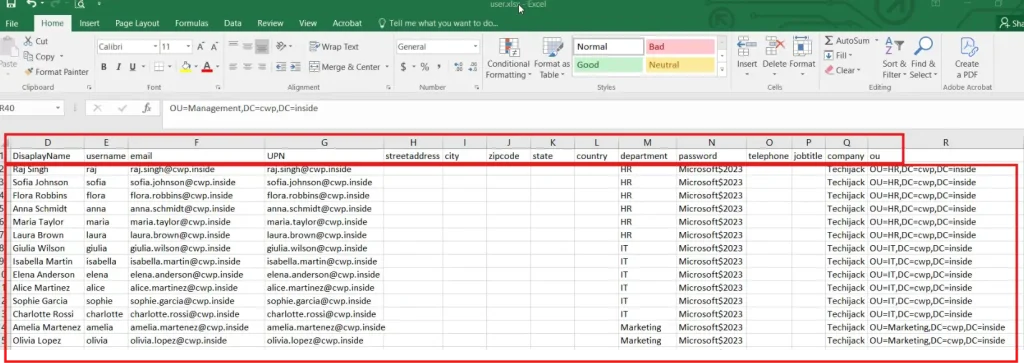
为了完成批量创建Active Directory用户的任务,首先,您必须格式化Excel文件,并在其中包含所有必需的字段。
您可以为用户创建特定属性的字段,我们在用户在AD中的属性中看到的字段。
然后用所需的名称,其他属性,例如部门和OU填充此Excel文件。
要设置OU,您应该找到OU的杰出名称
因此,您可以通过右键单击OU并单击属性编辑器,然后双击来找到DN名称区分名称。

一旦您将所有字段填充了您的用户名及其属性,
下图显示了字段和其他属性。
现在您可以尝试以CSV格式保存文件
要以CSV格式保存文件,请单击文件,然后单击另存为,浏览位置,然后选择格式为CSV。
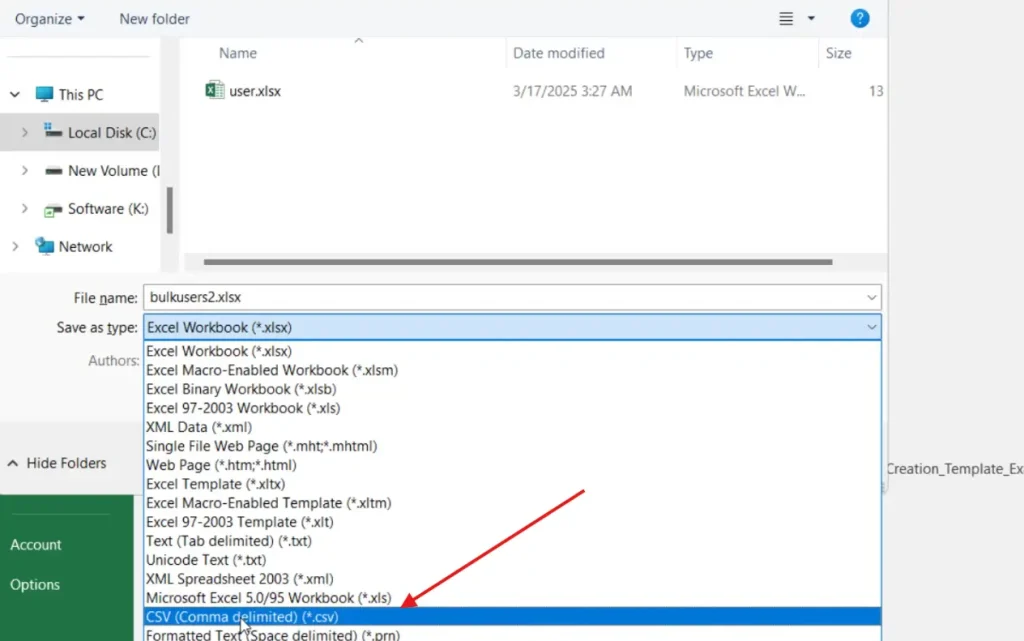
现在,这些文件已保存在CSV格式中。
现在,我们可以将此CSV文件放在服务器上。
在我们的情况下,我们将其放在位置C:tempbulkusers.csv
因此,CSV文件的名称是Bulkusers.csv保存在C驱动器内的临时目录中。
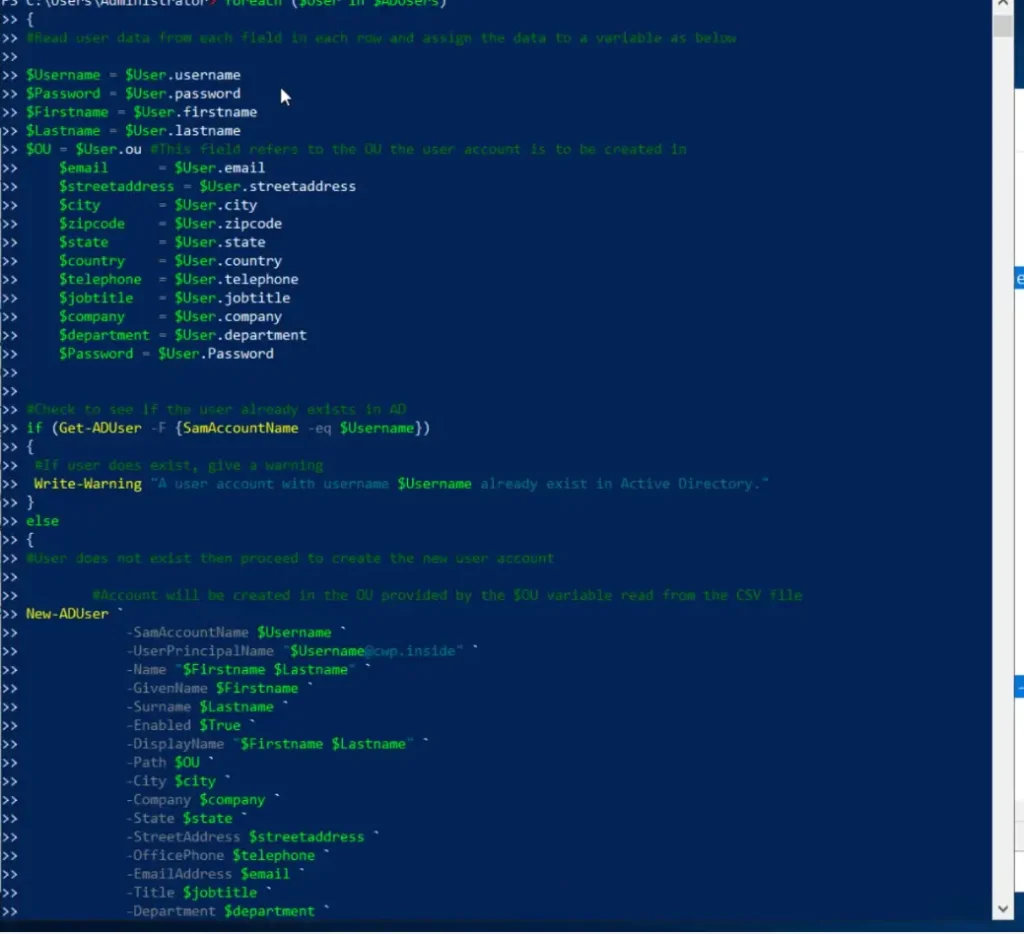
运行PowerShell脚本以在AD中创建批量用户
完成批量用户创建的任务
我们必须运行以下脚本。
# Import active directory module for running AD cmdlets
Import-Module activedirectory

#Store the data from bulkusers.csv in the $ADUsers variable
$ADUsers = Import-csv C:tempbulkusers.csv

#Loop through each row containing user details in the CSV file
foreach ($User in $ADUsers)
{
	#Read user data from each field in each row and assign the data to a variable as below

	$Username 	= $User.username
	$Password 	= $User.password
	$Firstname 	= $User.firstname
	$Lastname 	= $User.lastname
	$OU 		= $User.ou #This field refers to the OU the user account is to be created in
    	$email      = $User.email
    	$streetaddress = $User.streetaddress
    	$city       = $User.city
    	$zipcode    = $User.zipcode
    	$state      = $User.state
    	$country    = $User.country
    	$telephone  = $User.telephone
    	$jobtitle   = $User.jobtitle
    	$company    = $User.company
    	$department = $User.department
    	$Password = $User.Password

	#Check to see if the user already exists in AD
	if (Get-ADUser -F {SamAccountName -eq $Username})
	{
		 #If user does exist, give a warning
		 Write-Warning "A user account with username $Username already exist in Active Directory."
	}
	else
	{
		#User does not exist then proceed to create the new user account

        #Account will be created in the OU provided by the $OU variable read from the CSV file
		New-ADUser `
            -SamAccountName $Username `
            -UserPrincipalName "" `
            -Name "$Firstname $Lastname" `
            -GivenName $Firstname `
            -Surname $Lastname `
            -Enabled $True `
            -DisplayName "$Firstname $Lastname" `
            -Path $OU `
            -City $city `
            -Company $company `
            -State $state `
            -StreetAddress $streetaddress `
            -OfficePhone $telephone `
            -EmailAddress $email `
            -Title $jobtitle `
            -Department $department `
            -AccountPassword (convertto-securestring $Password -AsPlainText -Force) -ChangePasswordAtLogon $False

	}
}
确保将域名放在用户主名称中
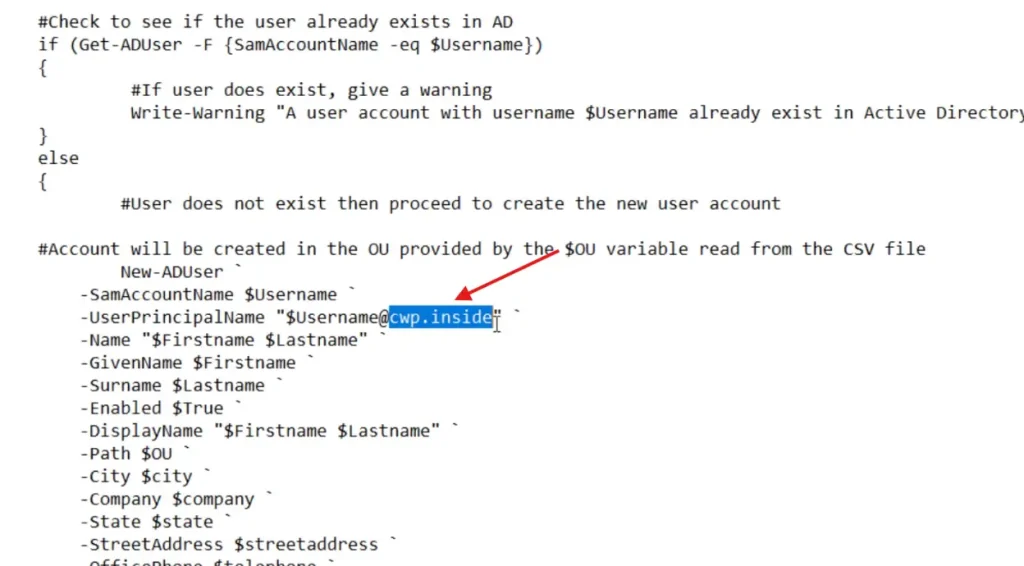
一旦您设置了格式化和编辑UPN
阅读更多:
现在您可以复制脚本并将其粘贴到PowerShell中
因此,运行脚本后,您将获得以下结果,并将创建所有用户。
现在脚本成功运行
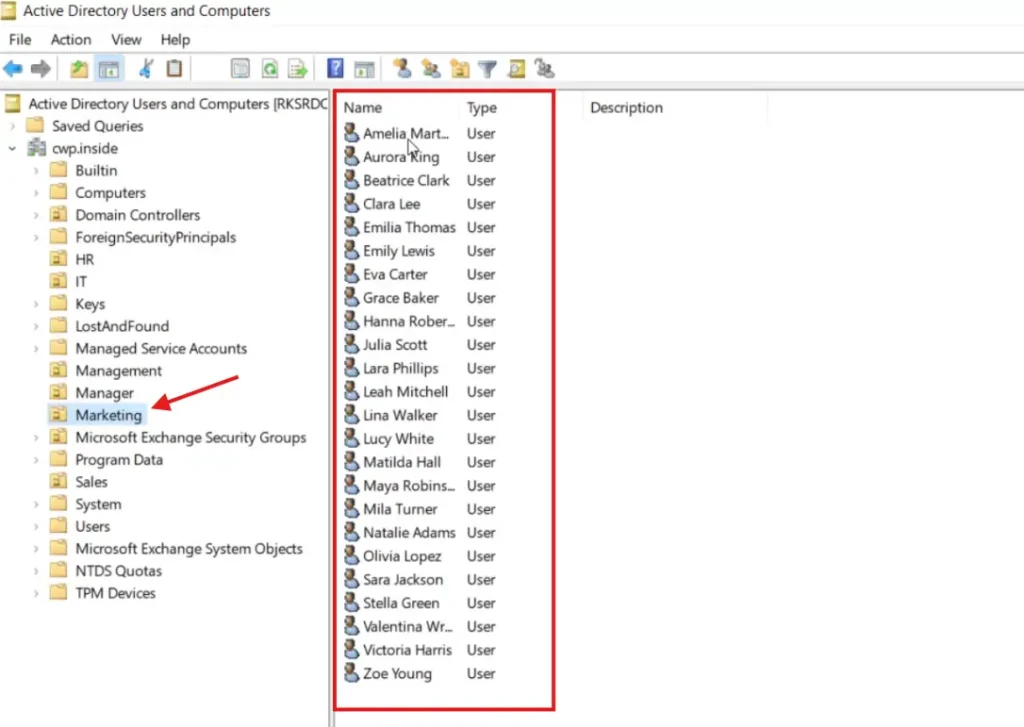
但是,如果我们去检查特定的OU,例如在我们的情况下进行营销。
我们发现现在创建了所需的用户。
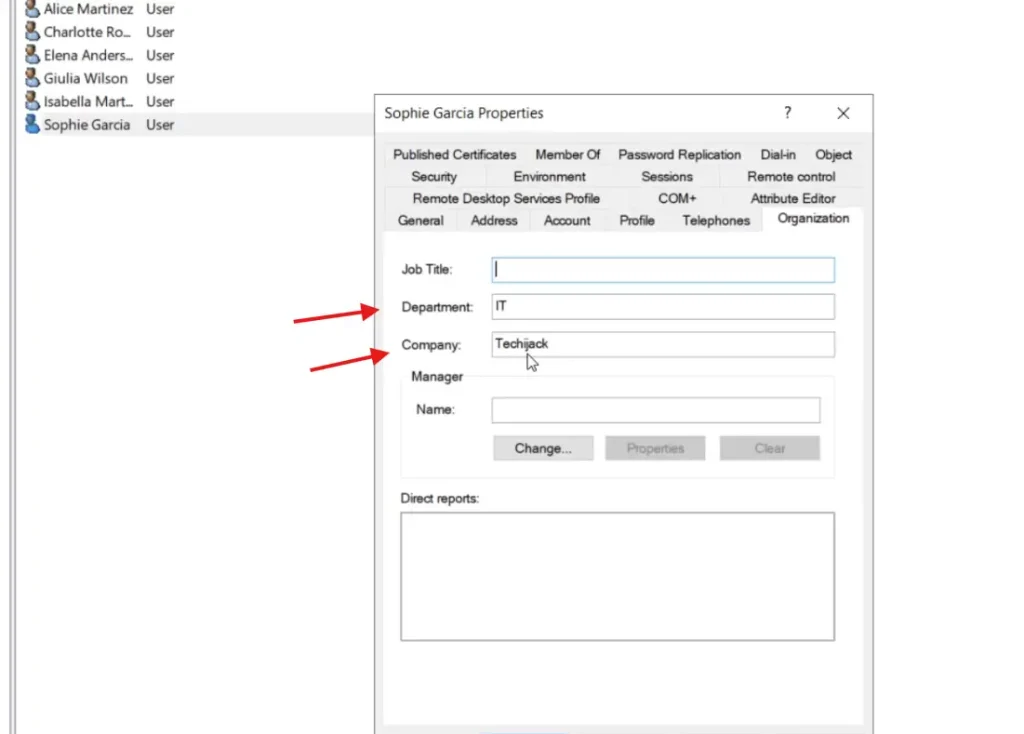
如果您检查组织下的用户的属性。
最后,您将看到我们在CSV文件中设置的相关部门和公司。
结论
每当您需要在Active Directory中创建多个用户时。
最好使用PowerShell脚本批量创建用户来节省时间。
因此,现在您了解了如何在Active Directory中创建批量用户。
如果您有与此帖子有关的任何问题,请随时联系。
您可能还喜欢其他一些相关帖子到Active Directory教程
此外,如果您想查看视频相同的视频,则可以在下面查看。